I spent a fair bit of time patching blemishes in the new plaster (trowel marks, etc) and sanding back to a smooth finish. Then a mist coat (watered down emulsion) was applied by brush to all corners of the walls and ceiling...
...followed by a full mist coat, applied with a roller, on the ceiling...
...and then the walls...
...and now to watch paint dry!
Once the mist coat was dry, I applied a coat of regular emulsion to the ceiling and a couple of the walls. I left the window wall for now, as there may be some minor damage when refurbishing the windows.
And so to the windows... These will be done one at a time and, because they will take a while, I will board up the opening whilst working on the sashes.
Starting with the left window, I prised away the staff beads. The first one is always tricky as it's held in place, not only by nails but also the other staff beads at the corners. There's just enough flex in the bead to release the nails from the frame and then slide it out.
With the staff beads removed, there's quite a large gap (about 8mm) visible on the right hand corner
The lower sash is then removed and the sash cords released.
And with the lower sash out, the parting beads can be accessed. Often, these are just a friction fit, but these have been pinned to the frame so were tricky to extract. I will probably have to replace these with new ones when I re-assemble the window.
The sash cords are knotted to stop the weights falling all the way to the bottom.
Having removed the parting beads, the upper frame could then be released and removed from the frame.
The sash cords were then untied and the weights removed from the pockets.
The upper sash was fitted with a pair of 6 lb weights and the lower sash a pair of 5 lb weights. Strange, as each sash weighs in the region of 22 lbs.
The sash pulleys seemed to be in pretty poor condition and had years of paint build-up on them so I set about removing them. Good job too, as one of them fell to pieces as it came out.
I will source some nice new shiny brass pulleys to replace these.
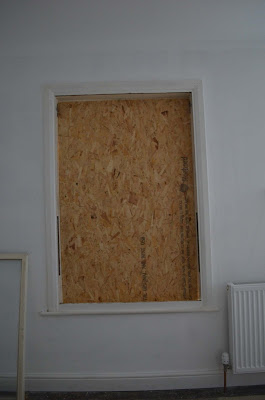
So, with everything now removed, I was able to cut a sheet of 9mm OSB3 to size and pin it into position against the outer casing.
A short video showing removal of the sashes:
New 2-part wood filler was then applied and sanded once set.
I planed down a piece of scrap timber to roughly the right size, then affixed it to the bottom rail using waterproof PVA adhesive, held temporarily with a few nails. Most of this will get planed away once the adhesive has fully set.


No comments:
Post a Comment