Sunday 27 March 2016

Weekly update 27.03.2016

It's been a long time coming, but this week I finally completed the first of the two windows in bedroom 1.

Before re-assembling it, I took advantage of the nice big aperture to climb out onto the bay window and do a spot of re-pointing.  There was a gap of about 5mm between the lintel and the outer frame. Likewise down one side, so I mixed up a bit of mortar and set about filling this. Whilst at it, I saw there were quite a few gaps between some of the bricks, requiring re-pointing so I did what I could reach of these too.


 So now the new brass pulleys could be fitted.


Next, the weights... I now had a full compliment of 10lb weights to do both windows.  I cut some of the new sash cord slightly over length, knotted one end and fed it through the top of the weight.

Then, a nail was tied to a length of thread and fed over the pulley. The weight of the nail pulled the thread down inside the casing whilst the other end of the thread was temporarily secured at the top with a piece of masking tape.


With the nail removed, the thread was tied to the end of the new sash cord and bound tight with a strip of insulating tape.


Using the thread, the sash cord was pulled up through the casing and out over the pulley...


...and then the weight was pulled up into the pocket in the casing. Obviously, the new 10lb weights are much longer than the old ones and therefore only just fitted through the aperture!!


This process was repeated for the other 3 pulleys.


The weight pockets were then closed up and secured with a single screw.


Next, the upper sash was lifted into position. The cords were inserted into the channels, pulled to the correct length, tied off and the excess trimmed off.

With the upper sash in place, the new parting beads could be installed. As this is only 6mm thick, I took the precaution of pre-drilling the nail holes to prevent the wood from splitting.


They were then inserted into the slots in the frame and the nails driven home.


With the lower sash inserted in the same way as the upper, the new staff beads could be fitted. Again, I pre-drilled the nail holes for these. Staring with the lower bead, I lined it up with the bottom edge of the sash, leaving enough clearance for the sash to slide but not too much to make it draughty. The side beads were installed in the same way, starting at the bottom so as to align with the lower bead, then working upwards, sliding the sash as I went, to ensure there was a consistent gap. Finally the upper bead was installed to meet the side beads at the corners.


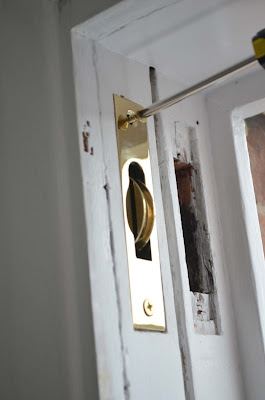
The finishing touch is the new brass Brighton fastener.


So, with the re-assembly taking no more than half a day, I set about removing the second window. By the end of the day, this was out and boarded up.


The sashes needed much the same treatment as the first set. I've added a thin strip of oak to the bottom of the lower sash and tapered it to fit the slightly off-square frame. The holes and blemishes have been filled and sanded and the frames primed.

The pocket covers were pretty grotty, so these have been stripped of paint, cleaned up and sanded.




Sunday 20 March 2016

Weekly update 20.03.2016

This week, work has continued on refurbishing the sashes in bedroom 1.  I'm still working on the first of two as the oil based paint needs 24 hours between each application.

The sashes have been filled and sanded to a smooth finish before being primed with No Nonsense all purpose primer.


 The new pulleys have a slightly longer faceplate and casing than the old ones...


...so I've pegged the old screw holes and opened up the rebates in the window casing to accommodate the new ones.


I managed to source some lightweight 6mm x 18mm hardwood strip which is perfect to replace the old parting beads.  This has been cut to size and checked for fit before painting.


Meanwhile, more coats of paint have been applied to the sashes and window frame.  On the outer facing surfaces I am using gloss white, whilst on inner facing surfaces I am using satinwood white. This is obviously a bit more time consuming than using just the one finish, but will look better.


I've decided to replace the staff beads with new, so these have been mitred...


...and checked for fit, before painting.


So, today, everything is now fully painted and has had plenty of time to dry.  I just need to get hold of some more of the 10 lb sash weights from my neighbour before re-assembly as I doubt the lighter ones will be sufficient.


Meanwhile, I've started snagging the bathroom... the tile edges have been painted white to match the walls and I've had to strip back an re-paint a section of the T&G panelling where a wood knot was bleeding resin.

Sunday 13 March 2016

Weekly update 13.03.2016

This week, I spent several days at my mum's house, working on her utility room so progress on the project house has been limited.

So, starting with the utility room (formerly a ground floor bathroom), there were several issues to resolve.  Firstly, where the bath had been removed, there was no floor covering.  Moreover, the rest of the floor was a few millimetres higher than where the bath had been.  Secondly, the toilet was leaking from where the flush pipe entered the rear of the pan.  Somebody had previously attempted a bodge repair using some kind of putty round the join so it was a horrible sticky mess.  And thirdly, I would need to re-cover the floor with new vinyl, as the old covering only reached as far as where the bath had been and, in any case, it had several cuts and tears in it.

Removing the WC pan was reasonably straightforward... a couple of screws held it to the floor so these were extracted.  Then the silicone bead which sealed it to the carcass was cut through with a sharp knife.  It was then a case of gently easing it forward and disconnecting the flush and waste pipes.  The waste pipe was stuffed with a bag of bubble-wrap to prevent nasty smells coming up from the drain.

The old vinyl covering was then lifted and the thin foam underlay scraped off the subfloor.


After priming the exposed concrete with a 1:4 mix of PVA and water, I mixed up a 20kg bag of rapid-set self levelling compound and poured this into the area of the old bath.  Minimal trowelling was required to achieve a level, smooth surface.  Although set within about 3 hours, this was given a full 24 hours to dry.


The new vinyl was trimmed roughly to shape and size, then strips of double sided adhesive tape were applied to the floor.  The vinyl was gradually smoothed down onto the tape and trimmed to fit.


So, with the new vinyl in place, the washing machine was manoeuvred back into position and reconnected to the water supply, power socket and waste pipe.


The 600mm carcass with Shaker style door was then positioned beside the washing machine and secured to the wall using angle brackets.


The worktop, which I had previously cut to fit, was then installed onto the carcass and more angle plates used to secure it to the wall.


With the cupboard legs adjusted for level, the plinth was trimmed and fitted.


The flush pipe for the WC was cleaned of all the sticky putty and a new internal flushcone was fitted, using a spot of washing up liquid as a lubricant.  The pan was then manoeuvred into position and the soil and flush pipes reconnected, again using a spot of washing up liquid.  The screws were reinserted and the toilet tested for leaks.


Back home to the project... you may recall I mentioned that the sash weights on the bedroom window seemed somewhat inadequate.  A chance conversation with a neighbour revealed that he had a whole load of old sash weights which had been removed from the windows of the house next door.

Both the upper and lower sashes are in excess of 20lbs, so I reckon a pair of 10lb sashes would be more appropriate than the 5 and 6lb weights currently installed.  I've taken a couple of the 10lb weights to try.  Firstly, they needed a good clean up to get the surface rust off.


I also took a pair of 8.5lb weights, but am guessing these may not be heavy enough.


The 10lb weights will only just fit the pockets and, even then, they will require a small amount of wood shaved off the back of the opening.

I also discovered that the nails that had been used to secure the architrave onto the window casing were too long as they were protruding into the cavity by about half an inch and fouling the weights as they went up and down.  I didn't want to have to remove the architraves so managed to run a thin hacksaw blade down the inside of the casing and saw through each one.


Meanwhile, I have been busy filling and sanding the sash frames which should soon be ready for re-painting.


I have ordered new brass pulleys and 6mm waxed cotton sash cord from Mighton Products and am looking forward to getting these fitted as they should finish off the refurbished windows quite nicely.


Sunday 6 March 2016

Weekly update 06.03.2016

I've focussed on the main bedroom again this week.  The skirtings have been sealed with decorators caulk and two part filler has been applied to the joints and smoothed off.

I spent a fair bit of time patching blemishes in the new plaster (trowel marks, etc) and sanding back to a smooth finish.  Then a mist coat (watered down emulsion) was applied by brush to all corners of the walls and ceiling...


...followed by a full mist coat, applied with a roller, on the ceiling...


...and then the walls...


...and now to watch paint dry!


Once the mist coat was dry, I applied a coat of regular emulsion to the ceiling and a couple of the walls.  I left the window wall for now, as there may be some minor damage when refurbishing the windows.


And so to the windows...  These will be done one at a time and, because they will take a while, I will board up the opening whilst working on the sashes.


Starting with the left window, I prised away the staff beads.  The first one is always tricky as it's held in place, not only by nails but also the other staff beads at the corners.  There's just enough flex in the bead to release the nails from the frame and then slide it out.


With the staff beads removed, there's quite a large gap (about 8mm) visible on the right hand corner


The lower sash is then removed and the sash cords released.


And with the lower sash out, the parting beads can be accessed.  Often, these are just a friction fit, but these have been pinned to the frame so were tricky to extract.  I will probably have to replace these with new ones when I re-assemble the window.


The sash cords are knotted to stop the weights falling all the way to the bottom.


Having removed the parting beads, the upper frame could then be released and removed from the frame.


Next, the paint seal was carefully cut round the weight pockets before unscrewing and removing them.


The sash cords were then untied and the weights removed from the pockets.


The upper sash was fitted with a pair of 6 lb weights and the lower sash a pair of 5 lb weights. Strange, as each sash weighs in the region of 22 lbs.


The sash pulleys seemed to be in pretty poor condition and had years of paint build-up on them so I set about removing them.  Good job too, as one of them fell to pieces as it came out.


I will source some nice new shiny brass pulleys to replace these.


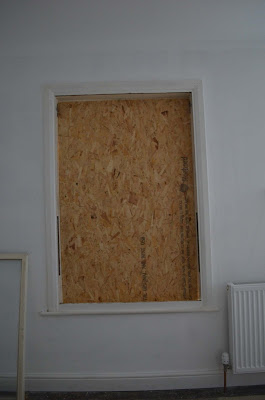
So, with everything now removed, I was able to cut a sheet of 9mm OSB3 to size and pin it into position against the outer casing.


A short video showing removal of the sashes:


The bedroom is now the window workshop!!


As mentioned earlier, the lower sash didn't sit square on the sill so I will pack this out with additional timber. First though, I needed to remove the old filler from the poorly fitted joints. For this, I used a dental burr in a hobby drill. These sashes have obviously had some work done on them in the past as there are splits in the timber and screws holding them together.


New 2-part wood filler was then applied and sanded once set.


I planed down a piece of scrap timber to roughly the right size, then affixed it to the bottom rail using waterproof PVA adhesive, held temporarily with a few nails. Most of this will get planed away once the adhesive has fully set.