
I ran the washer through the service programme and noticed that the new element was heating the water, but only intermittently. Investigating further, I could hear a microswitch randomly clicking on and off and deduced that it was the heater pressure switch that was cutting in and out. I figured there could be a couple of reasons for this: either the water pump wasn't producing enough pressure to keep the switch closed or the switch itself was faulty. I took a punt on the cheaper option and ordered a replacement pressure switch from eSpares. This is mounted on the back of the same rubber hose assembly as the heater element so a little more difficult to access.
The new pressure switch arrived within a couple of days and was duly fitted, again secured using a standard jubilee clip.

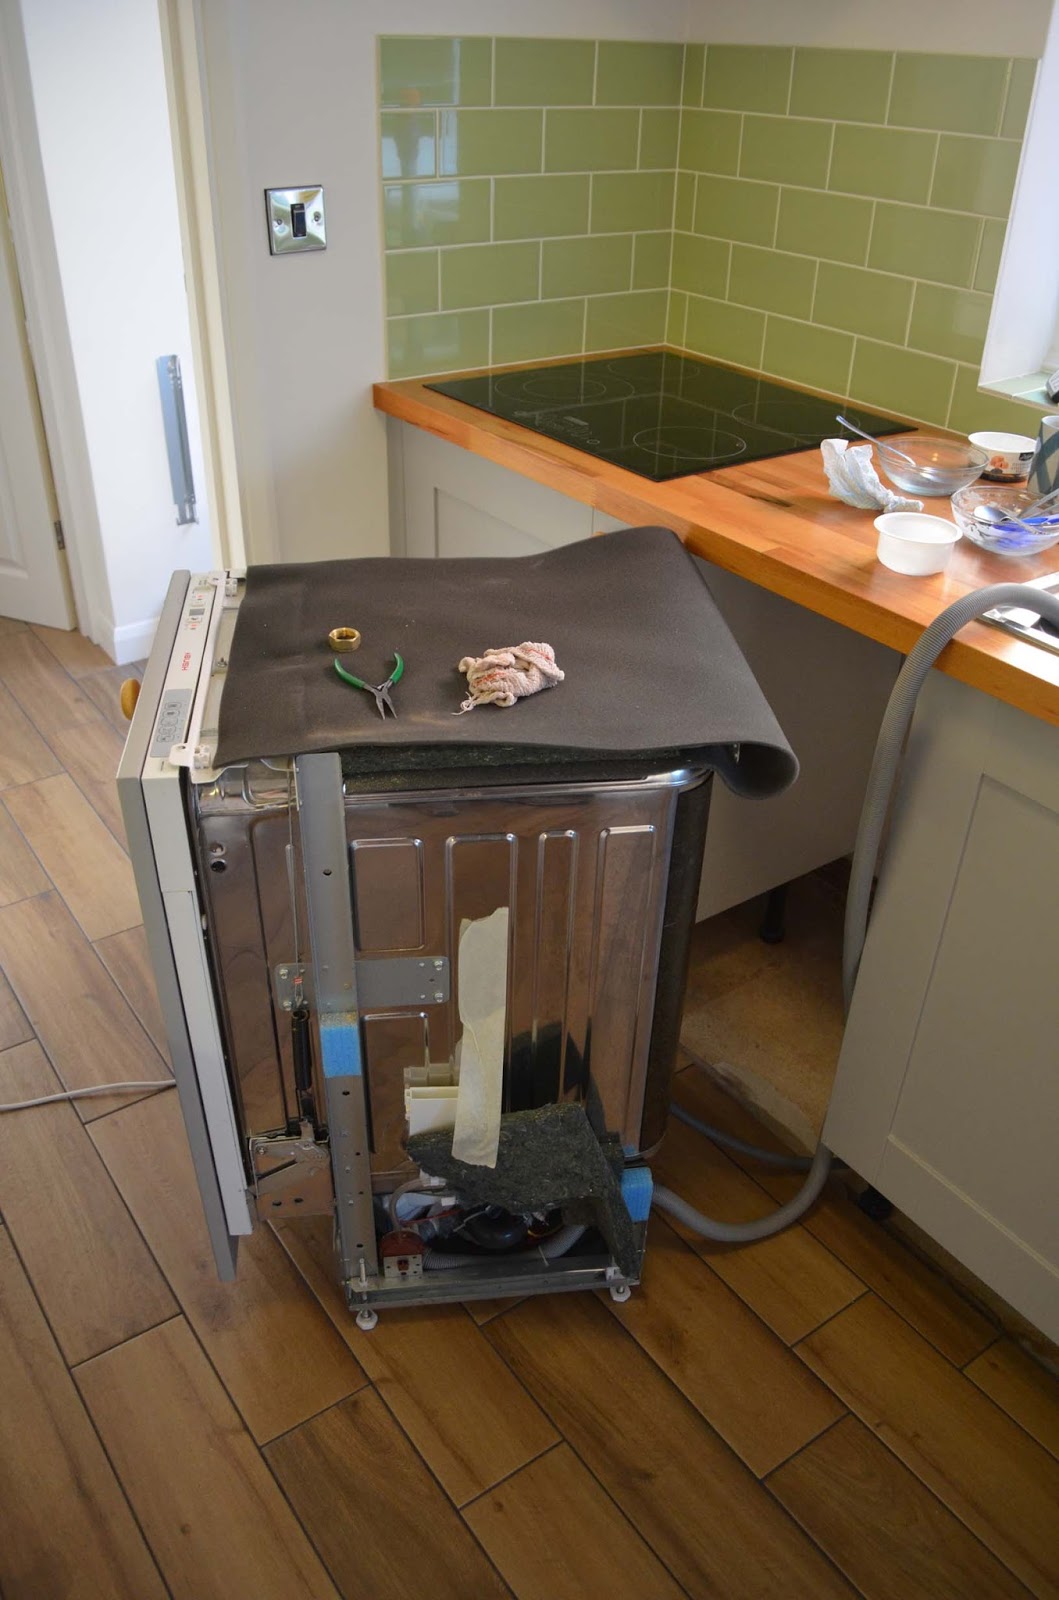
Running the service programme again proved inconclusive, so I ran it through a couple of full wash cycles and initial indications are good. On the strength of this, I've reassembled the washer and re-installed it.

Four more full wash cycles and it's looking promising... fingers crossed!!
Sooooo... back to the day job... plumbing to be precise. The central heating flow and return pipes from the boiler run directly under the floor of bedroom 3 so, before replacing the old floorboards I wanted to install the heated towel rail in the bathroom as this will connect into the circuit at this point. The pipes will run down through the ceiling into the lobby and then through the wall into the bathroom. I therefore thought I might as well install a small radiator in the lobby too as the pipes will be right there and, in any case, this end of the house is currently unheated.

I started by drilling the six fixing holes in the bathroom floor, making good use of the 8mm diamond grit drill bit to get through those rock hard tiles.

The upper mounts were then screwed to the wall and, with the towel rail temporarily in position, the pipe holes were marked and drilled through the skirting.

Inevitably, there was some damage to the plaster in the lobby where the drill bit burst through.

The damage was quite deep in places so I started by filling it with a bit of cement mortar mix. A couple of pieces of plastic pipe were used to maintain the hole positions.

Skimming plaster was then applied and, whilst it was drying, the radiator brackets were fitted and levelled.

Because the radiators and towel rail are fitted back-to-back, the plumbing took a bit of careful planning. After considering several options, I figured that this layout would produce the neatest solution. I've included a drain cock on the return leg so that it can be drained for maintenance.

With the radiator temporarily in place on the brackets, the plumbing could commence...

I started by soldering up the lower sections which 'T' off through the wall into the bathroom...

...then the radiator tails.

A quick check for alignment...

I soldered as much of the pipework as possible in-situ in order to maintain alignment. The wall was protected using a double layer of aluminium foil and a fire-proof soldering mat.

I repainted the wall and skirtings before soldering the final joints, taking care not to damage the new decor of course.

...and finally, the new radiator could be fitted and connected up.

The bathroom towel rail was screwed into position and the pipes connected.

The valves which came with the towel rail, whilst traditional in style, were not suited the plumbing configuration so I replaced them with these modern Torino angled valves which allow the copper pipe to fit discretely from the rear.

So, with the towel rail and the lobby radiator now fitted and plumbed in, I turned my attention to making the connections to the existing central heating circuit in bedroom 3. This is run in double wall plastic pipe (22mm and 15mm) with JP Speedfit push-fit connectors. I'd not used this technology before so it was a bit of a learning curve. I'd managed to retrieve a few offcuts of 22mm and 15mm plastic pipe from the bin when the system was originally installed last spring so just needed to equip myself with the necessary assortment of connectors, oh and a tool for cutting plastic pipe. Screwfix to the rescue once again!

At first sight, the JP Speedfit system seems a bit cumbersome - each piece of plastic pipe has to be terminated with a reinforcing insert before being inserted into its respective connector. The connectors themselves are quite bulky, but I have to say it all goes together really quickly and the joints are very secure. After draining down the radiators, I cut into the flow and return pipes at convenient locations and assembled the new pipework onto the two copper pipes which I had previously fed through the ceiling (at the far right of the furthest joist).


The filler simply screws into any of the radiator access holes, either where the blanking plug fits or the air bleed valve. The other end attaches to the bottle and the contents are then squeezed into the empty radiator... simples!

So... with all the valves and connections checked for tightness, I set about filling and pressurising the system. I steadily increased the system pressure to just over 1 bar and there were no signs of leakage. I went round the house and bled the air out of each of the radiators and all was well. On the strength of this, I switched on the boiler and fired up the central heating. I left the heating running for a few minutes and another check revealed no leaks. However... as soon as I opened the valve on the new radiator, there was a sudden and substantial ejection of hot water and steam from a joint in the copper pipe just below the lobby ceiling! Quick action was called for, so I switched off the boiler, shoved the hose pipe on the drain cock and released the water out of the system into the bath. Meanwhile, Jacqui held sheets and towels over the pipe to soak up as much as possible until the water level had dropped sufficiently.
A bit of a puzzle this one... the pipe was fine when the system was pressurised. It was only after the heating had been on for a while and the radiator valve opened that the joint failed. My guess was that there must have been a slight weakness in the solder joint which was fine whilst the water was cold, but was disturbed when the hot water flowed through it, expanding the joint. I temporarily capped off the rest of the central heating circuit so we could continue to heat the house, drained down the offending section of the system and left things overnight to dry out.
The following day, I carefully de-soldered and removed the elbow for forensic examination. There was a slight deformity evident at the very end of the pipe and, whilst the solder had flowed round the majority of the pipe, there was a small but clear section by the deformity where it hadn't made contact. It's amazing how much water can escape from such a tiny fracture when it's under a lilttle pressure!!

Rather than risking a repair of the existing assembly, I soldered up a new top section and fitted this to the rest of the pipework. I re-attached the plastic push-fit connectors and re-dosed the system with another bottle of inhibitor. The system was then re-filled, pressurised, bled and tested. There were a few nervous minutes waiting for it to get up to temperature, but pleased to report that (so far) there have been no further leaks!
No comments:
Post a Comment