
I could have dug out all of the old concrete and boarded across, but decided it would be better to just replace the damaged section with fresh concrete...
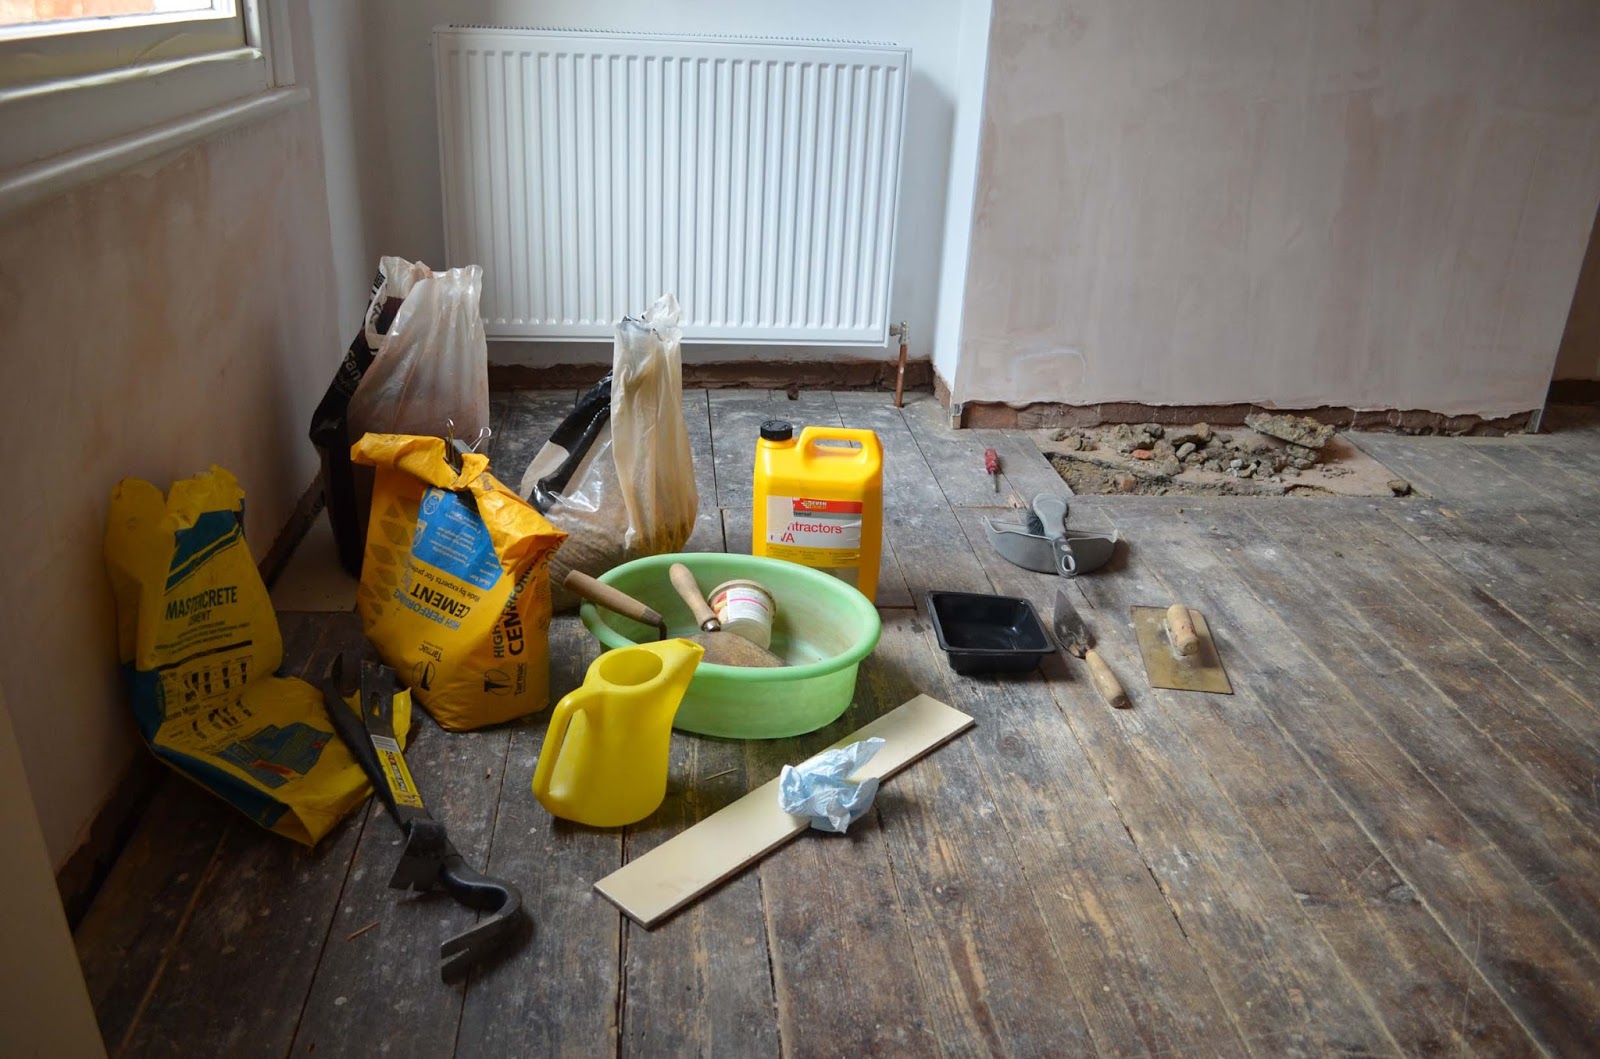
...so, out with the old...

...and in with the new. I left it a few millimetres lower than the floorboards to allow space for a thin cement screed once the concrete was set.

I then took up all the loose floorboards which had previously been lifted to facilitate the cabling and plumbing.

Sheets of 18mm T&G chipboard were then cut to fit the spaces and screwed down firmly using Spax flooring screws.


On Saturday, the new 18mm MDF floorboards were delivered. At 4.4m long it was a challenge to find somewhere suitable to store them so, for now, they are in bedroom 3 with the excess protruding out onto the top of the staircase! Health and Safety... what's that? The bedrooms will be fitted out with the 5" Torus profile and downstairs we will be using the 6" Ogee profile.

So, with the floor complete in bedroom 2, work could start straight away on the skirtings. The mitre saw is invaluable for trimming the boards to length and mitring the external corners. The internal corners have been carefully contoured to fit the profile using the jigsaw.

The plaster has not been well finished at the bottom of the walls so it has proved troublesome to get the skirtings flush and square. I've used screws to secure most lengths in place and grab adhesive for a couple of the more difficult pieces. The section behind the radiator has had to be fitted in two parts and spliced together with adhesive.

Screw holes are filled using a 2 part wood filler and sanded back to a smooth surface.

A little while before Christmas, the dishwasher decided to develop a fault so, now that the festivities are over, I've taken on the role of domestic appliance engineer! First, I carefully extracted the washer from between the units.
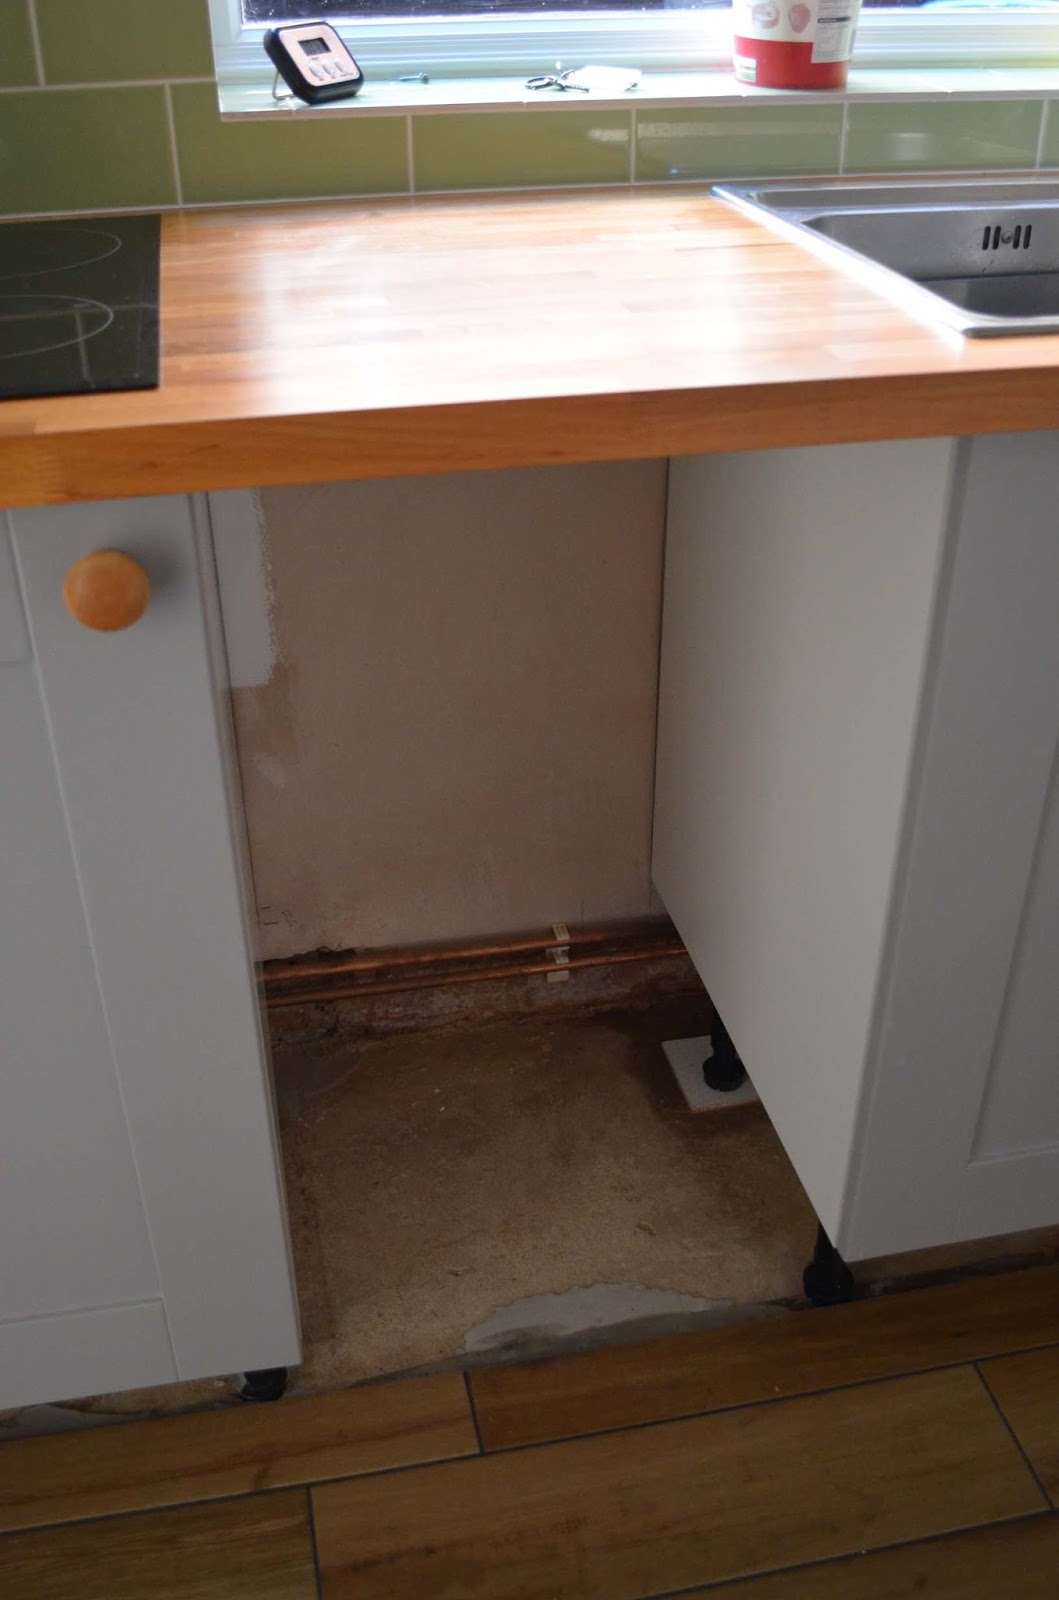
The washer wasn't heating the water so I suspected the heating element had gone (it had also tripped out the main switch on the consumer unit!). I managed to track down a service programme for a similar machine via the internet and so was able to put the washer into test mode. This also indicated a probable fault with the heater element. With the side of the washer removed, the heater element could just be seen through the cut-out in the insulation towards the bottom.


The element was secured to the rubber pipework with single-use bands. I carefully removed these so as to avoid damage to the pipework, disconnected the power cables and extracted the element.

...and here is the offending part removed.

Putting an Ohm-meter across the supply terminals indicates that it's open-circuit so I'm fairly confident that this is where the fault lies. Finding a replacement has proved something of a challenge. An extensive search of the internet turned up nothing for a Bush dishwasher. However, I came across an identical looking element which is for a Hoover Candy machine - it has the same dimensions and the same 1800W power rating so have taken a punt and ordered one... hopefully this will arrive in the week... watch this space!

No comments:
Post a Comment